MPC has published the VFX breakdown for Tim Burton’s Dark Shadows. You can see some of my texturing work on that project.
Enjoy.
Louvre HDRI panorama /
Check my latest high res panorama for 3D lighting, this time shoot in the Louvre museum in Paris, France.
Please contact me if you need color, lighting and reflection references for this one.
Cheers.
Worl War Z trailer /
Did you watch the new World War Z trailer?
I worked on this movie while ago at MPC London.
Just run :)
New Iron Man 3 trailer /
The new spectacular Iron Man 3 trailer is out.
I was helping out the texturing and look-dev teams at Trixter while ago.
Hope you like it.
Normalize textures in Softimage /
Just a quick video tutorial where I talk about my process to normalize textures in Softimage. Spanish audio.
Do you like to see my tutorials in English? Send me a line.
Cheers.
Zbrush displacement in V-Ray for Maya /
It is always a bit tricky to set up Zbrush displacements in the different render engines.
If you recently moved from Mental Ray or another engine to V-Ray for Maya, maybe you should know a few things about displacement maps extracted from Zbrush.
I wrote down here a simple example of my workflow dealing with that kind of maps and V-Ray.
- First of all drag and drop your 16 bits displacement to the displacement channel inside the shading group attributes.
- Maya will create a displacement node for you in the hypershade. Don’t worry to much about this node, you don’t need to change anything there.
- Select your geometry and add a V-Ray extra attribute to control the subdivisions and displacement properties.
- If you exported your displacement subdividing the UV’s, you should check that property in the V-Ray attributes.
- Edge lenght and Max subdivs are the most important parameter. Play with them until reach nice results.
- Displacement amount is the strength of your displacement and displacement shift sould be half negative than your displacement amount if you are using 16 bits textures.
- If you are using 32 bits .exr textures, the displacement shift should be 0 (zero).
- Select your 32 bits .exr file and add a V-Ray attribute called allow negative colors.
- Render and check that your displacement is looking good.
- I’ve been using these displacement maps. 16 bits and 32 bits.
The Lone Ranger - Super Bowl TV Spot /
Vray sss test /
Just testing Vray’s SSS shader for realistic skin look-dev purposes.
I ended with the theory that would be quite simple to set-up a nice, realistic and cheap SSS shader for human and creature assets. I love the raytraced solid scatter, but with complex models I can’t get rid of some of the artifacts in the SSS channel.
I will post more quite soon.
- To achieve better results, I like to combine SSS shaders with Vray Mtl shaders which have better solutions for speculars and reflections. With this method the reflection of the surface is controled by BRDF instead of the poor spec control of the SSS shader.
Iron Man 3 new material /
New Iron Man 3 material including an awesome official poster and the new teaser trailer for the Super Bowl.
It’s Courier, just better /

“Since the beginning, screenplays have been written in Courier. Its uniformity allows filmmakers to make handy comparisons and estimates, such as 1 page = 1 minute of screen time.
But there’s no reason Courier has to look terrible. We set out to make the best damn Courier ever.
We call it Courier Prime.”
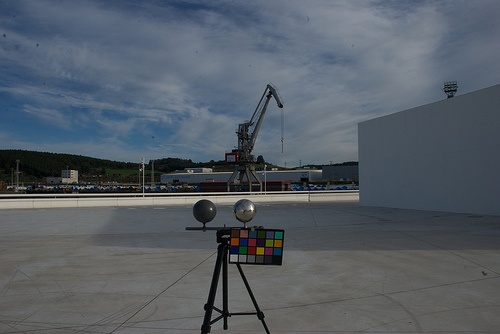
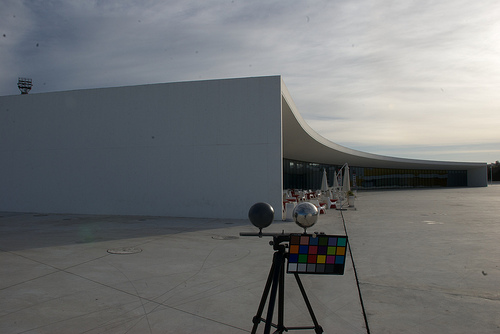
Portland Mews Panorama /
Another panorama for 3D lighting which I shot in Portland Mews, Soho, in London.
As usual I shot also clean plates and colour checkers.
Kyle Cooper interview /
Inspiring interview to one of the most respectable title designer of our times.
Isle of Skye panoramas /
Isle of Skye 0001
Isle of Skye 0007
Isle of Skye 0004
You can download the high resolution .exr plus clean plates here:
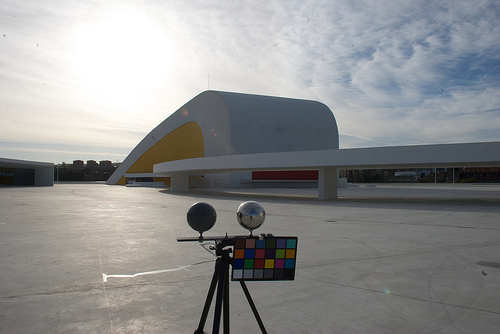
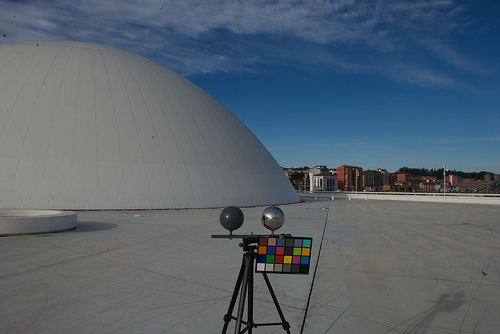
Niemeyer Building Panorama /
Another panorama for 3D lighting shot in Oscar Niemeyer’s building in Aviles, in the north of Spain.


World War Z /
The first teaser trailer for World War Z was released the last week.
I spent some time the last year working on some of those zombies.
You can watch the HD trailer here.
Enjoy it!
The Lone Ranger /
This is the first trailer for The Lone Ranger, one of my latest projects.
If you don’t know much about The Lone Ranger, I recommend you to visit the iTunes Store and download the original radio programs (podcasts) for free.
Iron Man 3 /
I’ve been working in Munich at Trixter on Iron Man 3.
The first spectacular trailer was released last week, enjoy it!
I was responsible for the textures of Iron Man for some of the most interesting shots of the trailer.
Now, I’m back in London working again at MPC.
Iron Man 3 trailer on Youtube.
Cheers!
Love Vray's IBL /
When you work for a big VFX or animation studio you usually light your shots with different complex light rigs, often developed by highly talented people.
But when you are working at home or for small studios or doing freelance tasks or whatever else.. you need to simplify your techniques and tray to reach the best quality as you can.
For those reasons, I have to say that I’m switching from Mental Ray to V-Ray.
One of the features that I most love about V-Ray is the awesome dome light to create image based lighting setups.
Let me tell you a couple of thing which make that dome light so great.
- First of all, the technical setup is incredible simple. Just a few clicks, activate linear workflow, correct the gamma of your textures and choose a nice hdri image.
- Is kind of quick and simple to reduce the noise generated by the hdri image. Increasing the maximum subdivisions and decreasing the threshold should be enough. Something between 25 to 50 or 100 as max. subdivision should work on common situations. And something like 0.005 is a good value for the threshold.
- The render time is so fast using raytracing stuff.
- Even using global illumination the render times are more than good.
- Displacement, motion blur and that kind of heavy stuff is also welcome.
- Another thing that I love about the dome light using hdri images is the great quality of the shadows. Usually you don’t need to add direct lights to the scene. If the hdri is good enough you can match the footage really fast and accurately enough.
- The dome light has some parameters to control de orientation of your hdri image and is quite simple to have a nice preview in the Maya’s viewport.
- In all the renders that you can see here, you probably realized that I’m using an hdri image with “a lot” of different lighting points, around 12 different lights on the picture. In this example I put a black color on the background and I changed all the lights by white spots. It is a good test to make a better idea of how the dome light treats the direct lighting. And it is great.
- The natural light is soft and nice.
- These are some of the key point because I love the VRay’s dome light :)
- On the other hand, I don’t like doing look-dev with the dome light. Is really really slow, I can’t recommend this light for that kind of tasks.
- The trick is to turn off your dome light, and create a traditional IBL setup using a sphere and direct lights, or pluging your hdri image to the VRay’s environment and turn on the global illumination.
- Work there on your shaders and then move on to the dome light again.
Texturing&Look-Dev Course 101 /

Finally my Introduction Course to Texturing and Look-Development in VFX Projects is out.
At this moment the Spanish version is the only one available, but I’m working on the English version and it will be ready for you pretty soon.
Meanwhile you can check all the information here.
Thanks!
Cookies /
Quick and dirty RealFlow test.
Not a big deal, just a couple of frames of my chocolate animation.