Hello patrons,
In this video we will finish this mini series about Solaris and Katana interoperability.
I'll be covering the topics that I didn't have time to cover in the first video, including.
- Manual set dressing from Solaris to Katana.
- Hero instancing from Solaris to Katana.
- background instancing and custom attributes from Solaris to Katana.
- Dummy crowds from Solaris to Katana.
- Everything using USD of course.
There are many more things that could be covered when it comes to Solaris and Katana interoperability, I'm pretty sure that I'll be covering some of them in future USD videos.
All the info on my Patreon.
scatterer
Dummy crowds in Houdini Solaris /
Quick video showing how to use one of my oldest tricks to create “dummy crowds“, but this time in Solaris, which makes this even easier and faster than using SOPs or MOPs.
I’ve used a flavour of this dummy crowds technique in many shots for a bunch of movies. It is very limited in so many ways, but when it works it works. You can populate your environments in minutes!
Please consider subscribing to my Patreon so I can keep making professional VFX training. Thanks. www.patreon.com/elephantvfx
Houdini scatterers 2/2 /
Hello patrons,
This is the second (and last) part of Houdini scatterers. We are going to take the tools that we made in the first video and see how we can use them to create complex and efficient scattering systems for your VFX shots, specially useful when dealing with huge environments.
I will show you some of my favourite worflows and share some techniques that I've used in the past in combination with the HDAs that we created in this series.
For those of you in tiers with downloadable material, you will have access to another post with some links to get the files.
As usual feel free to contact me with questions, suggestions, ideas, etc.
And if you like my content, please help me out and recommend it to you work mates.
All the info on my Patreon feed.
Thanks a lot for your suppor!
Xuan.
Houdini scatterers, part 1/2 /
Hello patrons,
This new video is part of the "little project" I made in Houdini and Redshift a while ago. In this part 1 of 2 video I show you how to create efficient tools in Houdini to deal with scattering, specifically focusing on environments. We are going to create a setup that takes care of randomization while using scattering techniques. Random rotation, random scale, random assets, etc.
Once the setups are done we are going to create tools or "digital assets" so you can re-use these tools as many times as you need in future porjects without re-doing the setups. We will create an interactive user interface to manipulate the tools.
In part 2 of this video I will show you different scattering techniques using these tools that we are going to build today.
The video is available on my Patreon site.
Thanks for your support!
Xuan.
Clarisse scatterers, part 01 /
Hello patrons,
I just posted the first part of Clarisse scatterers, in this video I'll walk you through some of the point clouds and scatterers available in Clarisse. We will do three production exercises, very simple but hopefully you will understand the workflow to use these tools to create more complicated shots.
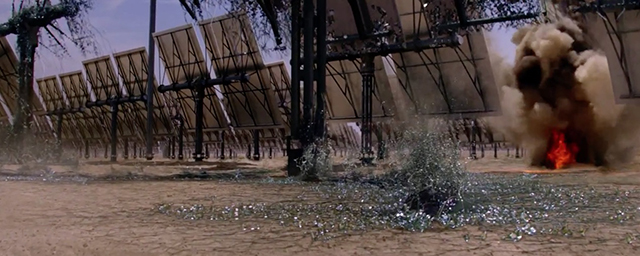
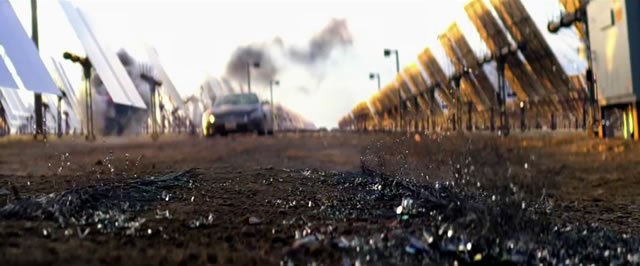
In the first exercise we'll be using the point array to create a simple but effective crowd of soldiers. Then we will use the point cloud particle system to generate the effect that you can see in the video attached to this post. A very common effect these days.
And finally we will use the point uv sampler to generate huge environments like forests or cities.
We will continue with more exercises in the second and last part of these scatterers series in Clarisse.
Check it out on my Patreon feed.
Thanks,
Xuan.
rendering Maya particles in Clarisse /
This is a very simple tutorial explaining how to render particle systems simulated in Maya inside Isotropix Clarisse. I already have a few posts about using Clarisse for different purposes, if you check by the tag "Clarisse" you will find all the previous posts. Hope to be publishing more soon.
In this particular case we'll be using a very simple particle system in Maya. We are going to export it to Clarisse and use custom geometries and Clarisse's powerful scatterer system to render millions of polygons very fast and nicely.
- Once your particle system has been simulated in Maya, export it via Alembic. One of the standard 3D formats for exchanging information in VFX.
- Create an IBL rig in Clarisse. In a previous post I explain how to do it, it is quite simple.
- With Clarisse 2.0 it is so simple to do, just one click and you are ready to go.
- Go to File -> Import -> Scene and select the Alembic file exported from Maya.
- It comes with 2 types of particles, a grid acting as ground and the render camera.
- Create a few contexts to keep everything tidy. Geo, particles, cameras and materials.
- In the geo context I imported the toy_man and the toy_truck models (.obj) and moved the grid from the main context to the geo context.
- Moved the 2 particles systems and the camera to their correspondent contexts.
- In the materials context I created 2 materials and 2 color textures for the models. Very simple shaders and textures.
- In the particles context I created a new scatterer calle scatterer_typeA.
- In the geometry support of the scatter add the particles_typeA and in the geometry section add the toy_man model.
- I’m also adding some variation to the rotation.
- If I move my timeline I will see the particle animation using the toy_man model.
- Do not forget to assign the material created before.
- Create another scatterer for the partycles_typeB and configure the geometry support and the geometry to be used.
- Add also some rotation and position variation.
- As these models are quite big compared with the toy figurine, I’m offsetting the particle effect to reduce the presence of toy_trucks in the scene.
- Before rendering, I’d like to add some motion blur to the scene. Go to raytracer -> Motion Blur -> 3D motion blur. Now you are ready to render the whole animation.
Cubes tutorial /
A few months ago, when my workmates from Double Negative were working on Transcendence, I saw them using Houdini to create such a beautiful animations using tiny geometries. They were like millions of small cubes building shapes and forms.
Some time later other people started doing similar stuff with Maya's XGen and other tools. I tried it and it works like a charm.
Frame from Transcendence.
Frame from Transcendence.
I was curious about these images and then decided to recreate something similar, but I wanted to do it in a simpler and quicker way. I found out that combining Cinema 4D and Maya is probably the easiest way to create this effect.
If you have any clue to do the same in Modo or Softimage, please let me know, I'm really curious.
This is my current approach.
In Cinema 4D create a plane with a lot of subdivisions. Each one of those subdivisions will generate a cube. In this case I’m using a 1000cm x 1000cm plane with 500 subdivisions.
Create a new material and assign it to the plane.
Select the plane and go to the menu Simulate -> Hair objects -> Add hair.
If you zoom in you will see that one hair guide is generated by each vertex of the plane.
In the hair options reduce the segments guides to 1 because we just need straight guides we don’t care about hair resolution.
Also change the root to polygon center. Now the guides growth from each polygon center instead of each vertex of the plane.
Remove the option render hair (we are not going to be rendering hairs) from the generate tab. Also switch the type to square.
Right now we can see cubes instead of hair guides, but they are so thin.
We can control the thickness using the hair material. In this case I’m using 1.9 cm
Next thing would be randomising the height. Using a procedural noise would be enough to get nice results. We can also create animations very quickly, just play with the noise values.
Remove the noise for now. We want to control the length using a bitmap.
Also hide the hair, it’s quicker to setup if we don’t see the hair in viewport.
In the Plane material, go to luminance and select a bitmap. Adjust the UV Mapping to place the bitmap in your desired place.
In the hair material, use the same image for the length parameter.
Copy the same uv coordinates from the plane material.
Add a pixel effect to the texture and type the number of pixels based on the resolution of the plane. In this case 500
Do this in both materials, the plane and the hair. Now each cube will be mapped with a small portion of the bitmap.
Display the hair system and voila, that’s it.
Obviously the greater contrast in your image the better. I strongly recommend you to use high dynamic range images, as you know the contrast ratio is huge compared with low dynamic images.
At this point you can render it here in C4D or just export the geometry to another 3D software and render engine.
Select the hair system and make it editable. Now you are ready to export it as .obj
Import the .obj in your favourite 3D software. Then apply your lighting and shaders, and connect the image that you used before to generate the hair system. Of course, you can control the color of the hair system using any other bitmap or procedurals.
In order to keep this work very simple, I’m just rendering a beauty pass and an ambient occlusion pass, but of course you can render as many aov’s as you need.
I also animate very quickly the translation of the hair system and added motion blur and depth of field to the camera to get a more dynamic image, but this is really up to you.
This is just the tip of the iceberg, with this quick and easy technique you can create beautiful images combining it with your expertise.
Introduction to scatterers in Clarisse /
Scatterers in Clarisse are just great. They are very easy to control, reliable and they render in no time.
I've been using them for matte painting purposes, just feed them with a bunch of different trees to create a forest in 2 minutes. Add some nice lighting and render insane resolution. Then use all the 3D material with all the needed AOV's in Nuke and you'll have full control to create stunning matte paintings.
To make this demo a bit funnier instead of trees I'm using cool Lego pieces :)
- Create a context called obj and import the grid.obj and the toy_man.obj
- Create another context called shaders and create generic shaders for the objs.
- Also create two textures and load the images from the hard drive.
- Assign the textures to the diffuse input of each shader and then assign each shader to the correspondent obj.
- Set the camera to see the Lego logo.
- Create a new context called crowd, and inside of it create a point cloud and a scatterer.
- In the point cloud set the parent to be the grid.
- In the scatterer set the parent to be the grid as well.
- In the scatterer set the point cloud as geometry support.
- In the geometry section of the scatterer add the toy_man.
- Go back to the point cloud and in the scattering geometry add the grid.
Now play with the density. In this case I’m using a value of 0.7
As you can see all the toy_men start to populate the image.
- In the decimate texture add the Lego logo. Now the toy_men stick to the Logo.
- Add some variation in the scatterer position and rotation.
- That’s it. Did you realise how easy was to setup this cool effect? And did you check the polycount? 108.5 million :)
- In order to make this look a little bit better, we can remove the default lighting and do some quick IBL setup.
Final render.