vfx

Introduction to Reality Capture by Xuan Prada

In this 3 hour tutorial I go through my photogrammetry workflow using Reality Capture in conjunction with Maya, Zbrush Mari and UV Layout.

I will guide you through the entire process, from capturing footage on-set until asset completion. I will explain the most basic settings needed to process your images in Reality Capture, to create point clouds, high resolution meshes and placeholder textures.
Then I will continue to develop the asset in order to make it suitable for any visual effects production.

This are the topics included in this tutorial.

- Camera gear.
- Camera settings.
- Shooting patterns.
- Footage preparation.
- Photogrammetry software.
- Photogrammetry process in Reality Capture.
- Model clean up.
- Retopology.
- UV mapping.
- Texture re-projection, displacement and color maps.
- High resolution texturing in Mari.
- Render tests.

Check it out on my Patreon feed.
Clarisse scatterers, part 01 by Xuan Prada

Hello patrons,

I just posted the first part of Clarisse scatterers, in this video I'll walk you through some of the point clouds and scatterers available in Clarisse. We will do three production exercises, very simple but hopefully you will understand the workflow to use these tools to create more complicated shots.

In the first exercise we'll be using the point array to create a simple but effective crowd of soldiers. Then we will use the point cloud particle system to generate the effect that you can see in the video attached to this post. A very common effect these days.
And finally we will use the point uv sampler to generate huge environments like forests or cities.

We will continue with more exercises in the second and last part of these scatterers series in Clarisse.

Check it out on my Patreon feed.

Thanks,
Xuan.

Katana, constraint lights to an alembic geometry by Xuan Prada

One of the most common situations while lighting a shot is attaching a CG light in your scene assembler to an alemic cache exported from Maya. This is very simple to do in Katana, let’s have a look at it.
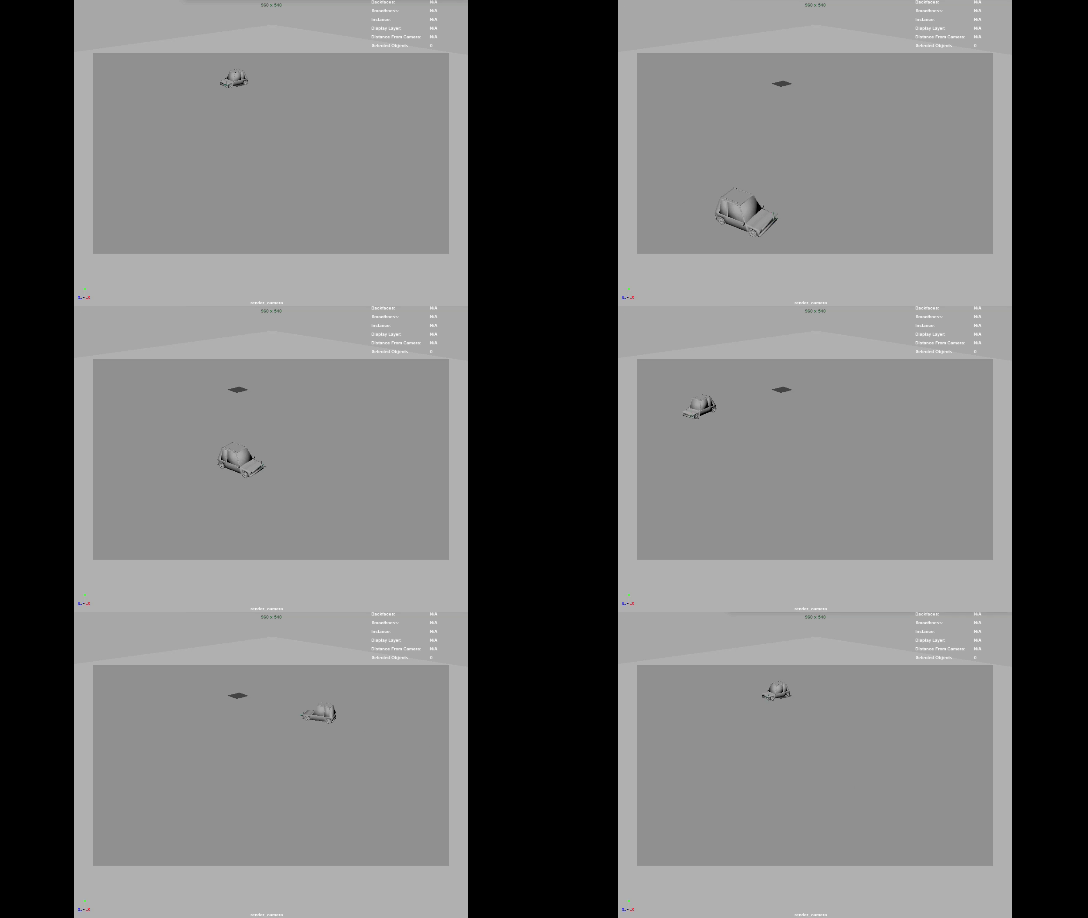
I’m using this simple animation of a car spining around.

01.gif

In most cases you need an object within the alembic cache that has the animation baked into it. The usual approach is to use a locator. To do so, snap it onto one of the lights geometry of the car and parent constrain it to the master control of the car. Then bake the animation of the locator and export it with the rest of the alembic cache to Katana.

In Katana, create a gafferThree node but do not place any lights yet. It is better to do the constraints first, if not you might have to deal with offset issues later on.
Use a parentChildConstraint node indicating the gaffer node in the basePath and the locator of the car in the target.

Now place both headlights according with the model of the car. If you press play they should follow the animation of the car perfectly.

04.gif

In case you forget to do the parentConstraint before adding lights to the gaffer, you might have to control the offset and compensate for it. To actually see the values you can add constraintResolve and a transformEdit to check the transformations.

Houdini as scene assembler part 04 by Xuan Prada

Let’s talk a little bit about cameras in Houdini. Most of the time cameras will be coming from other 3D apps or tracking/matchmoving apps. The most common file format then it would be alembic. Apparently alembic cameras are not very welcome in Houdini, don’t ask me why, but there are certain issues that might occur. In my experience most visual effects companies have their own way to import alembic cameras.

I have never used fbx cameras in a professional environment but I have done a few tests at home and it seems to work fine. So, if you get weird issues using alembic maybe fbx could be a solution for your particular case. Go to file -> import to do so.

To create cameras in Houdini use the camera node. Here are some important features to consider when working with cameras in Houdini.

  • If you need to scale the camera, not very common but it can happen, do not scale the camera itself, just connect a null to the camera and transform the null instead.

  • Render resolution is set in the camera attributes. It can be overwritten in the ROP node but by default it uses the camera resolution.

  • There are different types of camera projection, perspective, orthographic, etc. There is also a spherical lens preset in case you need to render equirectangular panoramas.

  • Apperture parameter is pretty much the same as sensor size, this is very useful when matching real cameras (always in vfx)

  • Near/far clipping, same as every 3d app, important when working with big/small scales.

  • Background image: It places an image in the background that actually gets render. Usually you don’t want this to happen for final rendering. If you disable this option, the image won’t be visible during render time but it still will be visible in the viewport. Use the below icon to disable it.

  • To see safe areas go to display -> guides (display is d key).

  • Sampling parameters

    • Shutter time: Controls motion blur

    • Focus distance and f-stop: Control depth of field

    • To see focus distance, select the camera and click on show handle

Houdini as scene assembler part 02 by Xuan Prada

In the previous post I showed you how to load alembic caches using the file node and then change the viewport visualization to bounding box. This is good enough if you are let's say look-deving a character. If you want to load a heavy alembic cache, like a very detailed city with a lot of buildings, or a huge spaceship, you might want to use a different approach.

Instead of using a file node, it is better to use the alembic node to load you assets, and then set the option Load As: alembic delayed load primitives, and display as bounding box. This isn't actually loading the geometry in memory and it will be way more efficient down the line.

In this post I'm just talking about shading assignment in Houdini.
The easiest and more simple way to assign shaders is by selecting the asset node in the /obj context and assign a shader in the render tab. Your Mantra shaders should be placed in the /mat context and your Arnold shaders in the /shop context as /mat is not fully supported yet.

In the /mat context you can just go and create a Mantra Principled Shader. For Arnold, it is better to create an arnold shader network and then any arnold shader inside connected to the surface input.

Houdini doesn't have an isolation mode for shading components like Maya (as far as I know) but you can drag and drop shaders and textures onto the viewport or IPR while look-deving. This only works in the /mat context (again, as far as I know).

Another way of assigning shaders is creating material nodes inside of the alembic node. This material nodes can be assigned to different parts of your asset using wildcards. To assign multiple materials you can create different tabs in the material node or you can just concatenate material nodes (which I prefer). This technique works with both Mantra and Arnold.

You will find yourself most of the time creating material networks (Mantra) or shop networks (arnold) containing all the shaders of your asset. In a lighting shot you will end up with different subnetworks for each asset on the shot.
This subnetworks of shaders can be place at the /obj level or inside of the alembics containing your assets.

Another clever way of assignment shaders is using the data tree -> object appearance. This only works at object level. If you want to go deeper in your alembic asset, you need to add first a node called packed edit. Then in the data tree you will have access to all the different parts of your asset.

There is another way of controlling looks in Houdini, and that is using the material style sheets. We will cover this tool in future posts.

Introduction to gaffer by Xuan Prada

By gaffer hq: Gaffer is a free, open-source, node-based VFX application that enables look developers, lighters, and compositors to easily build, tweak, iterate, and render scenes. Built with flexibility in mind, Gaffer supports in-application scripting in Python and OSL, so VFX artists and technical directors can design shaders, automate processes, and build production workflows.

With hooks in both C++ and Python, Gaffer's readily extensible API provides both professional studios and enthusiasts with the tools to add their own custom modules, nodes, and UI.

The workhorse of the production pipeline at Image Engine Design Inc., Gaffer has been used to build award-winning VFX for shows such as Jurassic World: Fallen Kingdom, Lost in Space, Logan, and Game of Thrones.

Ricoh Theta for image acquisition in VFX by Xuan Prada

This is a very quick overview of how I use my tiny Ricoh Theta for lighting acquisition in VFX. I always use one of my two traditional setups for capturing HDRI and bracketed textures but on top of that, I use a Theta as backup. Sometimes if I don't have enough room on-set I might only use a Theta, but this is not ideal.

There is no way to manually control this camera, shame! But using an iPhone app like Simple HDR at least you can do bracketing. Still can't control it, but it is something.

As always capturing any camera data, you will need a Macbeth chart.

For HDRI acquisition it is always extremely important to have good references for you lighting distribution, density, temperature, reflection and shadow. Spheres are a must.

For this particular exercise I'm using a Mini Manfrotto tripod to place my camera above 50cm from the ground aprox.

This is the equitectangular map that I got after merging 7 brackets generated automatically with the Theta. There are 2 major disadvantages if you compare this panorama with the ones you typically get using a traditional DSLR + fisheye setup.

  • Poor resolution, artefacts and aberrations
  • Poor dynamic range

I use HDR merge pro in Photoshop to merge my brackets. It is very fast and it actually works. But never use Photoshop to work with data images.

Once the panorama has been stitched, move to Nuke to neutralise it.

Start by neutralising the plate.
Linearization first, followed by white balance.

Copy the grading from the plate to the panorama.

Save the maps, go to Maya and create an IBL setup.
The dynamic range in the panorama is very low compared with what we would have if were using a traditional DSLR setup. This means that our key light is not going to work very well I'm afraid.

If we compare the CG against the plate, we can easily see that the sun is not working at all.

The best way to fix this issue at this point is going back to Nuke and remove the sun from the panorama. Then crop it and save it as a HDR texture to be mapped in a CG light.

Map the HDR texture to a area light in Maya and place it accordingly.

Now we should be able to match the key light much better.

Final render.

Mixing displacement and multiple bump maps by Xuan Prada

A very common situation when look-deving an asset is combining various displacement and bump maps. Having them in different texture maps gives you the possibility to play with them and making very fast changes without going back to Mari and Zbrush and waste a lot of time going back and forward until reaching the right look. You also want to keep busy your look-dev team, of course.

While ago I told you how to combine different displacement maps coming from different sources, today I want to show you how to combine multiple bump maps, with different scales and values. This is a very common situation in vfx, I would say every single asset has at least one displacement layer and one bump layer, but usually, you would have more than one. This is how you can combine multiple bump layers in Maya/Arnold.

  • The first thing I'm going to do is add a displacement layer. To make this post easy I'm using a single displacement layer. Refer back to the tutorial I mentioned previously on this post to mix more than one displacement layer.
  • Now connect your first bump map layer as usual. Connecting the red channel to the bump input of the shader.
  • in the hypershade create a file texture for your second bump layer. In this case a low frequency noise.
  • Create an avergage node and two multiply nodes.
  • Connect the red channel of the first bump layer to the input 1 of the multiply node. Control the intensity of this layer with the input 2 of the multiply node.
  • Repeat with previous step with the second bump layer.
  • Connect the outputs of both multiply nodes to the inputs 3D0 and 3D1 of the average node.
  • It is extremely important to leave the bump depth at 1 in order to make this work.

On-set tips: Creating high frequency detail by Xuan Prada

In a previous post I mentioned the importance of having high frequency details whilst scanning assets on-set. Sometimes if we don't have that detail we can just create it. Actually sometimes this is the only way to capture volumes and surfaces efficiently, specially if the asset doesn't have any surface detail, like white objects for example.

If we are dealing with assets that are being used on set but won't appear in the final edit, it is probably that those assets are not painted at all. There is no need to spend resources on it, right? But we might need to scan those assets to create a virtual asset that will be ultimately used on screen.

As mentioned before, if we don't have enough surface detail it will be so difficult to scan assets using photogrammetry so, we need to create high frequency detail on our own way.

Let's say we need to create a virtual assets of this physical mask. It is completely plain, white, we don't see much detail on its surface. We can create high frequency detail just painting some dots, or placing small stickers across the surface.

In this particular case I'm using a regular DSLR + multi zoom lens. A tripod, a support for the mask and some washable paint. I prefer to use small round stickers because they create less artifacts in the scan, but I run out of them.

I created this support while ago to scan fruits and other organic assets.

The first thing I usually do (if the object is white) is covering the whole object with neutral gray paint. It is way more easy to balance the exposure photographing again gray than white.

Once the gray paint is dry I just paint small dots or place the round stickers to create high frequency detail. The smallest the better.

Once the material has been processed you should get a pretty decent scan. Probably an impossible task without creating all the high frequency detail first.

On-set tips: The importance of high frequency detail by Xuan Prada

Quick tip here. Whenever possible use some kind of high frequency detail to capture references for your assets. In this scenario I'm scanning with photos this huge rock, with only 50 images and very bad conditions. Low lighting situation, shot hand-held, no tripod at all, very windy and raining.
Thanks to all the great high frequency detail on the surface of this rock the output is quite good to use as modeling reference, even to extract highly detailed displacement maps.

Notice in the image below that I'm using only 50 pictures. Not much you might say. But thanks to all the tiny detail the photogrammetry software does very well reconstructing the point cloud to generate the 3D model. There is a lot of information to find common points between photos.

The shooting pattern couldn't be more simple. Just one eight all around the subject. The alignment was completely successfully in Photoscan.

As you can see here, even with a small number of photos and not the best lighting conditions, the output is quite good.

I did an automatic retopology in Zbrush. I don't care much about the topology, this asset is not going to be animated at all. I just need a manageable topology to create a nice uv mapping and reproject all the fine detail in Zbrush and use it later as displacement map.

A few render tests.

UV to Mesh by Xuan Prada

Mi friend David Munoz Velazquez just pointed me to this great script to flatten geometries based on UV Mapping, pretty useful for re-topology tasks. In this demo I use it to create nice topology for 3D garments in Marvelous Designer. Then I can apply any new simulation changes to the final mesh using morphs. Check it out.

Clarisse shading layers: Crowd in 5 minutes by Xuan Prada

One feature that I really like in Clarisse are the shading layers. With them you can drive shaders based on naming convention or location of assets in the scene. With this method you can assign shaders to a very complex scene structure in no time. In this particular case I'll be showing you how to shade an entire army and create shading/texturing variations in just a few minutes.

I'll be using an alembic cache simulation exported from Maya using Golaem. Usually you will get thousand of objects with different naming convention, which makes the shading assignment task a bit laborious. With shading layer rules in Clarisse we can speed up a lot this tedious process

  • Import an alembic cache with the crowd simulation through file -> import -> scene
  • In this scene I have 1518 different objects.
  • I'm going to create an IBL rig with one of my HDRIs to get some decent lighting in the scene.
  • I created a new context called geometry where I placed the army and also created a ground plane.
  • I also created another context called shaders where I'm going to place all my shaders for the soldiers.
  • In the shaders context I created a new material called dummy, just a lambertian grey shader.
  • We are going to be using shading layers, to apply shaders globally based on context and naming convention. I created a shading layers called army (new -> shading layer).
  • With the pass (image) selected, select the 3D layer and apply the shading layer.
  • Using the shading layer editor, add a new rule to apply the dummy shader to everything in the scene.
  • I'm going to add a rule for everything called heavyArmor.
  • Then just configure the shader for the heavyArmour with metal properties and it's correspondent textures.
  • Create a new rule for the helmets and apply the shader that contains the proper textures for the helmets.
  • I keep adding rules and shaders for different parts of the sodliers.
  • If I want to create random variation, I can create shading layers for specific names of parts or even easier and faster, I can put a few items in a new context and create a new shading rule for them. For the bodies I want to use caucasian and black skin soldiers. I grabbed a few bodies and place them inside a new context called black. Then create a new shading rules where I apply a shader with different skin textures to all the bodies in that context.
  • I repeated the same process for the shields and other elements.
  • At the end of the process I can have a very populated army with a lot of random texture variations in just a few minutes.
  • This is how my shading layers look like at the end of the process.

UDIM workflow in Nuke by Xuan Prada

Texture artists, matte painters and environment artists often have to deal with UDIMs in Nuke. This is a very basic template that hopefully can illustrate how we usually handle this situation.

Cons

  • Slower than using Mari. Each UDIM is treated individually.
  • No virtual texturing, slower workflow. Yes, you can use Nuke's proxies but they are not as good as virtual texturing.

Pros

  • No paint buffer dependant. Always the best resolution available.
  • Non destructive workflow, nodes!
  • Save around £1,233 on Mari's license.

Workflow

  • I'll be using this simple footage as base for my matte.
  • We need to project this in Nuke and bake it on to different UDIMs to use it later in a 3D package.
  • As geometry support I'm using this plane with 5 UDIMs.
  • In Nuke, import the geometry support and the footage.
  • Create a camera.
  • Connect the camera and footage using a Project 3D node.
  • Disable the crop option of the Project 3D node. If not the proejctions wouldn't go any further than UV range 0-1.
  • Use a UV Tile node to point to the UDIM that you need to work on.
  • Connect the img input of the UV Tile node to the geometry support.
  • Use  a UV Project node to connect the camera and the geometry support.
  • Set projection to off.
  • Import the camera of the shot.
  • Look through the camera in the 3D view and the matte should be projected on to the geometry support.
  • Connect a Scanline Render to the UV Project.
  • Set the projection model to UV.
  • In the 2D view you should see the UDIM projection that we set previously.
  • If you need to work with a different UDIM just change the UV Tile.
  • So this is the basic setup. Do whatever you need in between like projections, painting and so on to finish your matte.
  • Then export all your UDIMs individually as texture maps to be used in the 3D software.
  • Here I just rendered the UDIMs extracted from Nuke in Maya/Arnold.

rendering Maya particles in Clarisse by Xuan Prada

This is a very simple tutorial explaining how to render particle systems simulated in Maya inside Isotropix Clarisse. I already have a few posts about using Clarisse for different purposes, if you check by the tag "Clarisse" you will find all the previous posts. Hope to be publishing more soon.

In this particular case we'll be using a very simple particle system in Maya. We are going to export it to Clarisse and use custom geometries and Clarisse's powerful scatterer system to render millions of polygons very fast and nicely.

  • Once your particle system has been simulated in Maya, export it via Alembic. One of the standard 3D formats for exchanging information in VFX.
  • Create an IBL rig in Clarisse. In a previous post I explain how to do it, it is quite simple.
  • With Clarisse 2.0 it is so simple to do, just one click and you are ready to go.
  • Go to File -> Import -> Scene and select the Alembic file exported from Maya.
  • It comes with 2 types of particles, a grid acting as ground and the render camera.
  • Create a few contexts to keep everything tidy. Geo, particles, cameras and materials.
  • In the geo context I imported the toy_man and the toy_truck models (.obj) and moved the grid from the main context to the geo context.
  • Moved the 2 particles systems and the camera to their correspondent contexts.
  • In the materials context I created 2 materials and 2 color textures for the models. Very simple shaders and textures.
  • In the particles context I created a new scatterer calle scatterer_typeA.
  • In the geometry support of the scatter add the particles_typeA and in the geometry section add the toy_man model.
  • I’m also adding some variation to the rotation.
  • If I move my timeline I will see the particle animation using the toy_man model.
  • Do not forget to assign the material created before.
  • Create another scatterer for the partycles_typeB and configure the geometry support and the geometry to be used.
  • Add also some rotation and position variation.
  • As these models are quite big compared with the toy figurine, I’m offsetting the particle effect to reduce the presence of toy_trucks in the scene.
  • Before rendering, I’d like to add some motion blur to the scene. Go to raytracer -> Motion Blur -> 3D motion blur. Now you are ready to render the whole animation.

VFX footage input/output by Xuan Prada

This is a very quick and dirty explanation of how the footage and specially colour is managed in a VFX facility.

Shooting camera to Lab
The RAW material recorded on-set goes to the lab. In the lab it is converted to .dpx which is the standard film format. Sometimes the might use exr but it's not that common.
A lot of movies are still being filmed with film cameras, in those cases the lab will scan the negatives and convert them to .dpx to be used along the pipeline.

Shooting camera to Dailies
The RAW material recorded on-set goes to dailies. The cinematographer, DP, or DI applies a primary LUT or color grading to be used along the project.
Original scans with LUT applied are converted to low quality scans and .mov files are generated for distribution.

Dailies to Editorial
Editorial department receive the low quality scans (Quicktimes) with the LUT applied.
They use these files to make the initial cuts and bidding.

Editorial to VFX
VFX facilities receive the low quality scans (Quictimes) with LUT applied. They use these files for bidding.
Later on they will use them as reference for color grading.

Lab to VFX
Lab provides high quality scans to the VFX facility. This is pretty much RAW material and the LUT needs to be applied.
The VFX facility will have to apply the LUT's film to the work done by scratch by them.
When the VFX work is done, the VFX facility renders out exr files.

VFX to DI
DI will do the final grading to match the Editorial Quicktimes.

VFX/DI to Editorial
High quality material produced by the VFX facility goes to Editorial to be inserted in the cuts.


The basic practical workflow would be.

  • Read raw scan data.
  • Read Quicktime scan data.
  • Dpx scans usually are in LOG color space.
  • Exr scans usually are in LIN color space.
  • Apply LUT and other color grading to the RAW scans to match the Quicktime scans.
  • Render out to Editorial using the same color space used for bringing in footage.
  • Render out Quicktimes using the same color space used for viewing. If wathcing for excample in sRGB you will have to bake the LUT.
  • Good Quicktime settings: Colorspace sRGB, Codec Avid Dnx HD, 23.98 frames, depth million of colors, RGB levels, no alpha, 1080p/23.976 Dnx HD 36 8bit